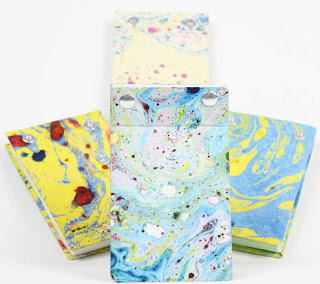

1. To begin this assignment we placed paper in water and put different oil paints in the water to make various designs.
2. We let it dry for the day and then measured the size of the notepad we wanted to make both an inside and outside cover on the front and back.
3. We cut the paper out and glued the paper to a cardboard in the shape of a rectangle.
4. After cutting and gluing, we punched two holes on the top of the notepad using the hole punch drill.
5. We then placed two screws in the top in order to bind the notepad.
6. In the end, we took a picture using the camera and the lights to capture the image of our hardwork.
It was really unique to be able to make paper have a marble look to it, I enjoyed swirling the paint around to make the different designs. When I used the drills to punch my holes, the holes did not come out perfectly, it was a bit rough around the edges, but in the end the screw fit in fine and looked good.
No comments:
Post a Comment